Articles
Extreme Makeover: 5 Tips for Reorganizing and Improving Your Trainual
December 8, 2022

Jump to a section
Here at Trainual, our customer success team works directly with clients to help take their business playbooks to the next level.
But what if you’re not ready to make the leap to one-on-one coaching and just need a little help organizing your playbook?
Consider yourself covered.
We recently had our success coaches host a feature at Playbook 2022, and in this session, they share five easy ways you can organize your Trainual for best results.
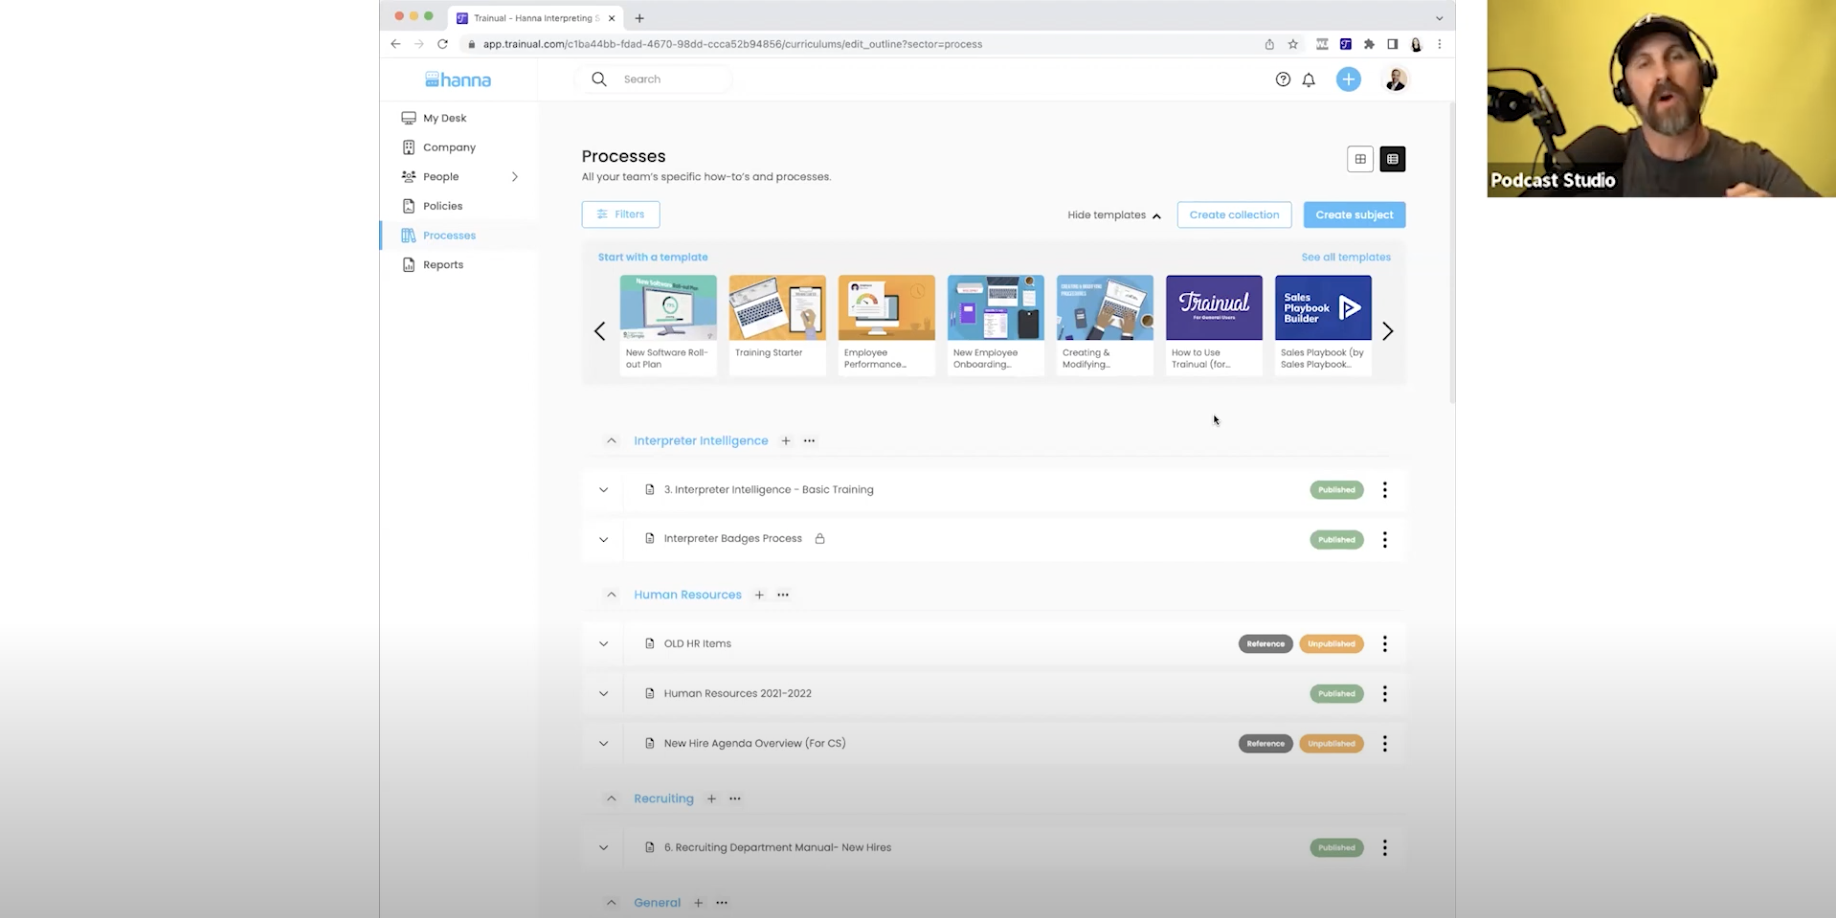
1. Organize subjects by company, policies, and processes.
When you start building your Trainual, you’re either moving over existing documentation or starting fresh with new content. Either way, these subjects should be organized into the following buckets: Company, Policies, or Processes.
You can find these buckets on the left-hand side of the dashboard. But let’s cover what each section should include before we dive into the tactical steps:
Company
This page should include all of the content that defines your business identity. For example, you could add your mission, vision, and values in this section. Or, you can include your team introductions and the software used across your company.
Policies
This page is designed for all your company rules and regulations. AKA, what’s okay and not okay for your employees to do. For example, this page should include your time-off policy, diversity and inclusion policy, or your workplace safety policy.
Processes
This page includes any documentation that answers a how-to question or explains how you execute a process at your company. For instance, this can include your sales process, invoicing process, or how to request time off.
When you visit each of these pages, there should be a list of the corresponding content. But because clients often put all of their documentation under processes, the other two buckets (company and policies) are usually empty.
If that’s the case for your Trainual, go into the “Processes” tab and move the content into its relevant bucket. To do that, select the vertical ellipsis (⋮) next to the subject, click “Move To,” and select the right page for that piece of content.

2. Clean up and group content by using collections.
Once your subjects are organized by company, policy, or process, you can get even more specific by creating collections within Trainual. This tool helps content creators categorize their documentation by department, so it’s easy to find when they need it.
For example, you could create a human resources collection and put all of your people-oriented documentation in there. Or, you could make an accounting collection and put all the corresponding content inside that collection.
Either way, your departments know precisely where to find all of their owned content. They can quickly jump to their section without going through a long list of subjects. And they can visually see where documentation could be improved since some collections will look light after organizing.
To create a collection, start on the “Processes” page and click “Create Collection” on the top right of the dashboard. Next, name your collection and add the appropriate content using the drop-down list. You can also search for content if you don’t want to wade through a bunch of options.
Then, continue this step until you’ve organized all your processes into their relevant collections.
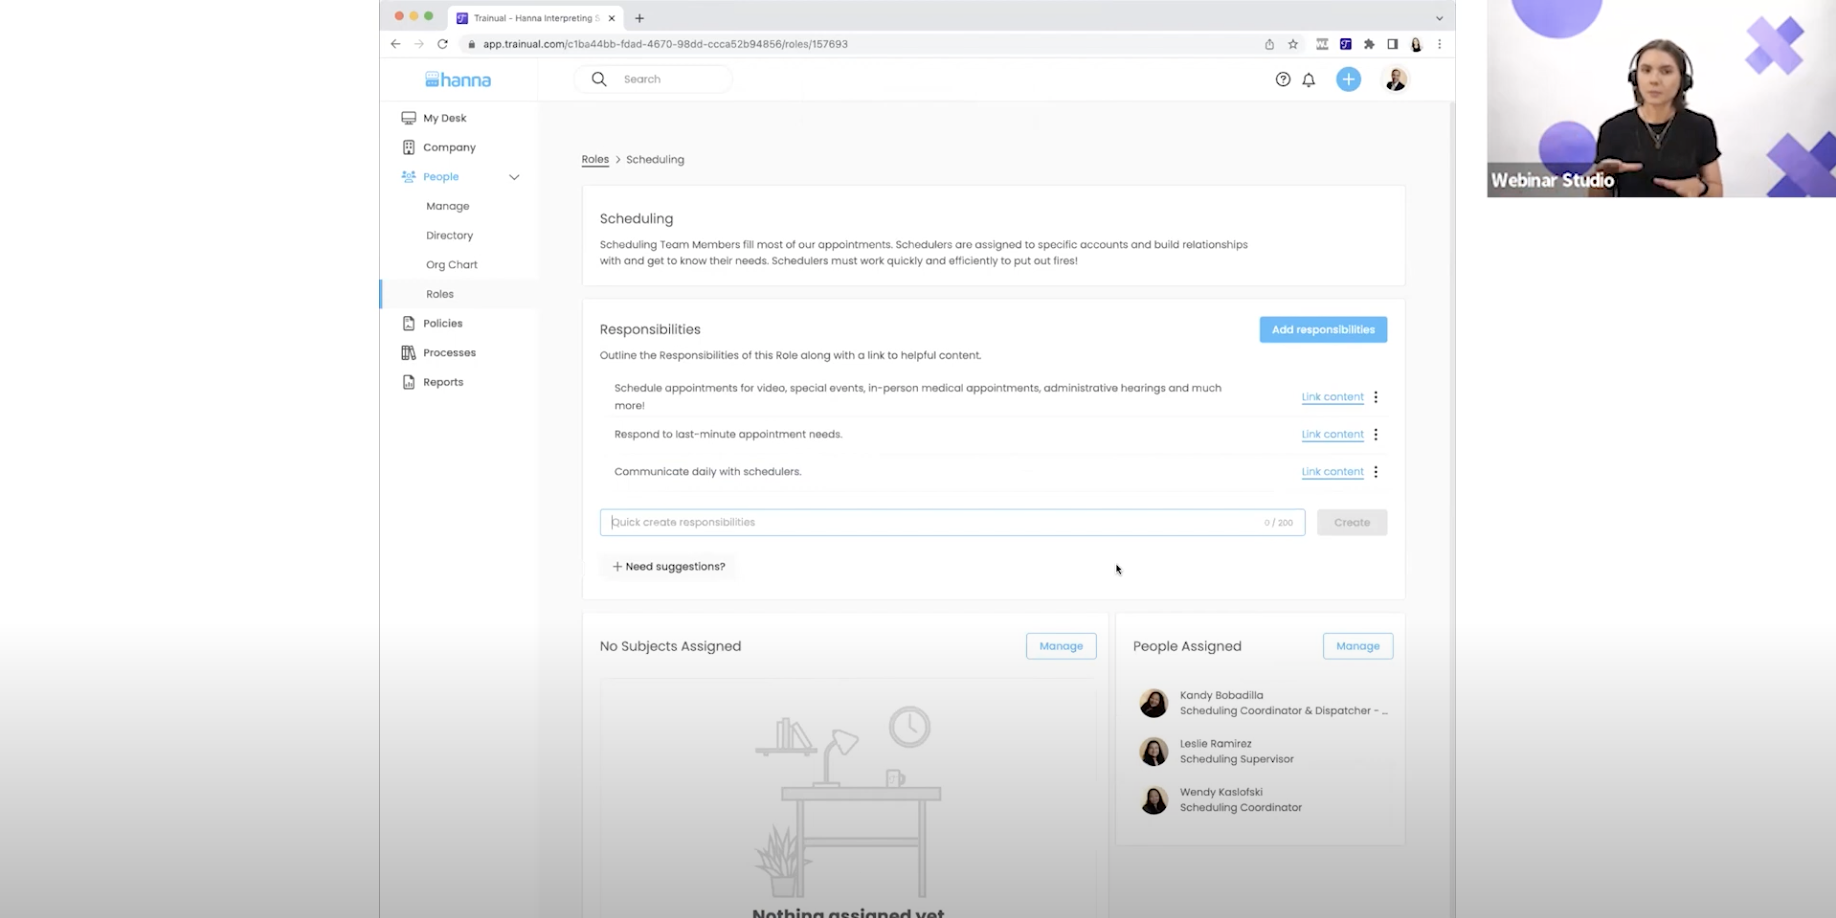
3. Use roles to create a full-circle employee experience.
When it comes to creating a full-circle experience for employees, “Roles” is one of the most powerful tools in Trainual. That’s because it makes assigning the right content to the right people easy, seamless, and more efficient.
You can think of roles as the hats employees wear while running your business. For example, an employee might wear two hats when they start at your company: the new hire hat and the scheduler hat. But with Trainual, you can ensure they have access to both types of content.
To create a new role, go to the “Roles” page under “People” and select “Create role.” Then, name the role accordingly (new hire, scheduler, etc.) and add their responsibilities. Afterwards, you can assign the relevant content that makes sense for that role.
For instance, you would add any content from your “Company” bucket to the new hire role. Or, you would assign the scheduling process to the scheduler. Then, continue assigning the relevant content until you’re finished (the collections you made earlier will make this easier).
This way, you can easily assign the correct batch of content to the right people. And those people always have access to the knowledge and processes they need.
4. Create as many roles as you want to assign other content.
Oftentimes, there’s content in your playbook that’s outside someone’s role (but still needs to be assigned). For example, we have a “webinar facilitator role” that’s primarily used by customer experience but could be used by other people in the company.
Inside Trainual, we outline the responsibilities and assign any relevant content inside the webinar facilitator role. This way, we can assign the right tasks and content to anyone who has to host a webinar (without having to assign all of the individual subjects).
These “sub roles” are great for documenting tasks that need more than just a few lines of content to explain — or for tasks that require any training before they’re carried out. Either way, you can use “Roles” to keep that content organized and easy to assign to others.
5. Leverage help when you need it.
These tips are easy to execute, but sometimes you need to go a little deeper to fully understand all of the capabilities and tricks for maximizing your Trainual account. Luckily, our customer success team has plenty of resources (and even one-on-one coaching) to sharpen your Trainual skills:
- Super Awesome Training Design. Turn your basic company manual into an engaging playbook with this free training (recorded live every Thursday).
- Trainual University. Get Trainual certified and learn how to build engaging training that scales with any team. Levels 1 and 2 are available now for free (with digital badges).
- Success coaches. Team up with one of our success coaches for a free coaching session. We’ll cover the proven strategies that improve training results.
Or, you can always search for your specific questions on the help page.
At the end of the day, one of our biggest goals is to empower you with the tools to be successful. Try these tips and tricks out in your Trainual — and hit us up if you need an assist with your playbook makeover.
Share it!


More from this author


Become a better business leader in 5 minutes or less.
Join over 100K readers who get The Manual in their inbox each month.
Similar Blog Posts
.avif)