


If you're looking to improve your business operations, process mapping is a critical tool. It helps you understand what's going on and identify areas for improvement. This guide will walk you through the process in a step-by-step format. By the end, you'll be able to create a process map that provides valuable insights into your business processes.
Understanding Process Mapping
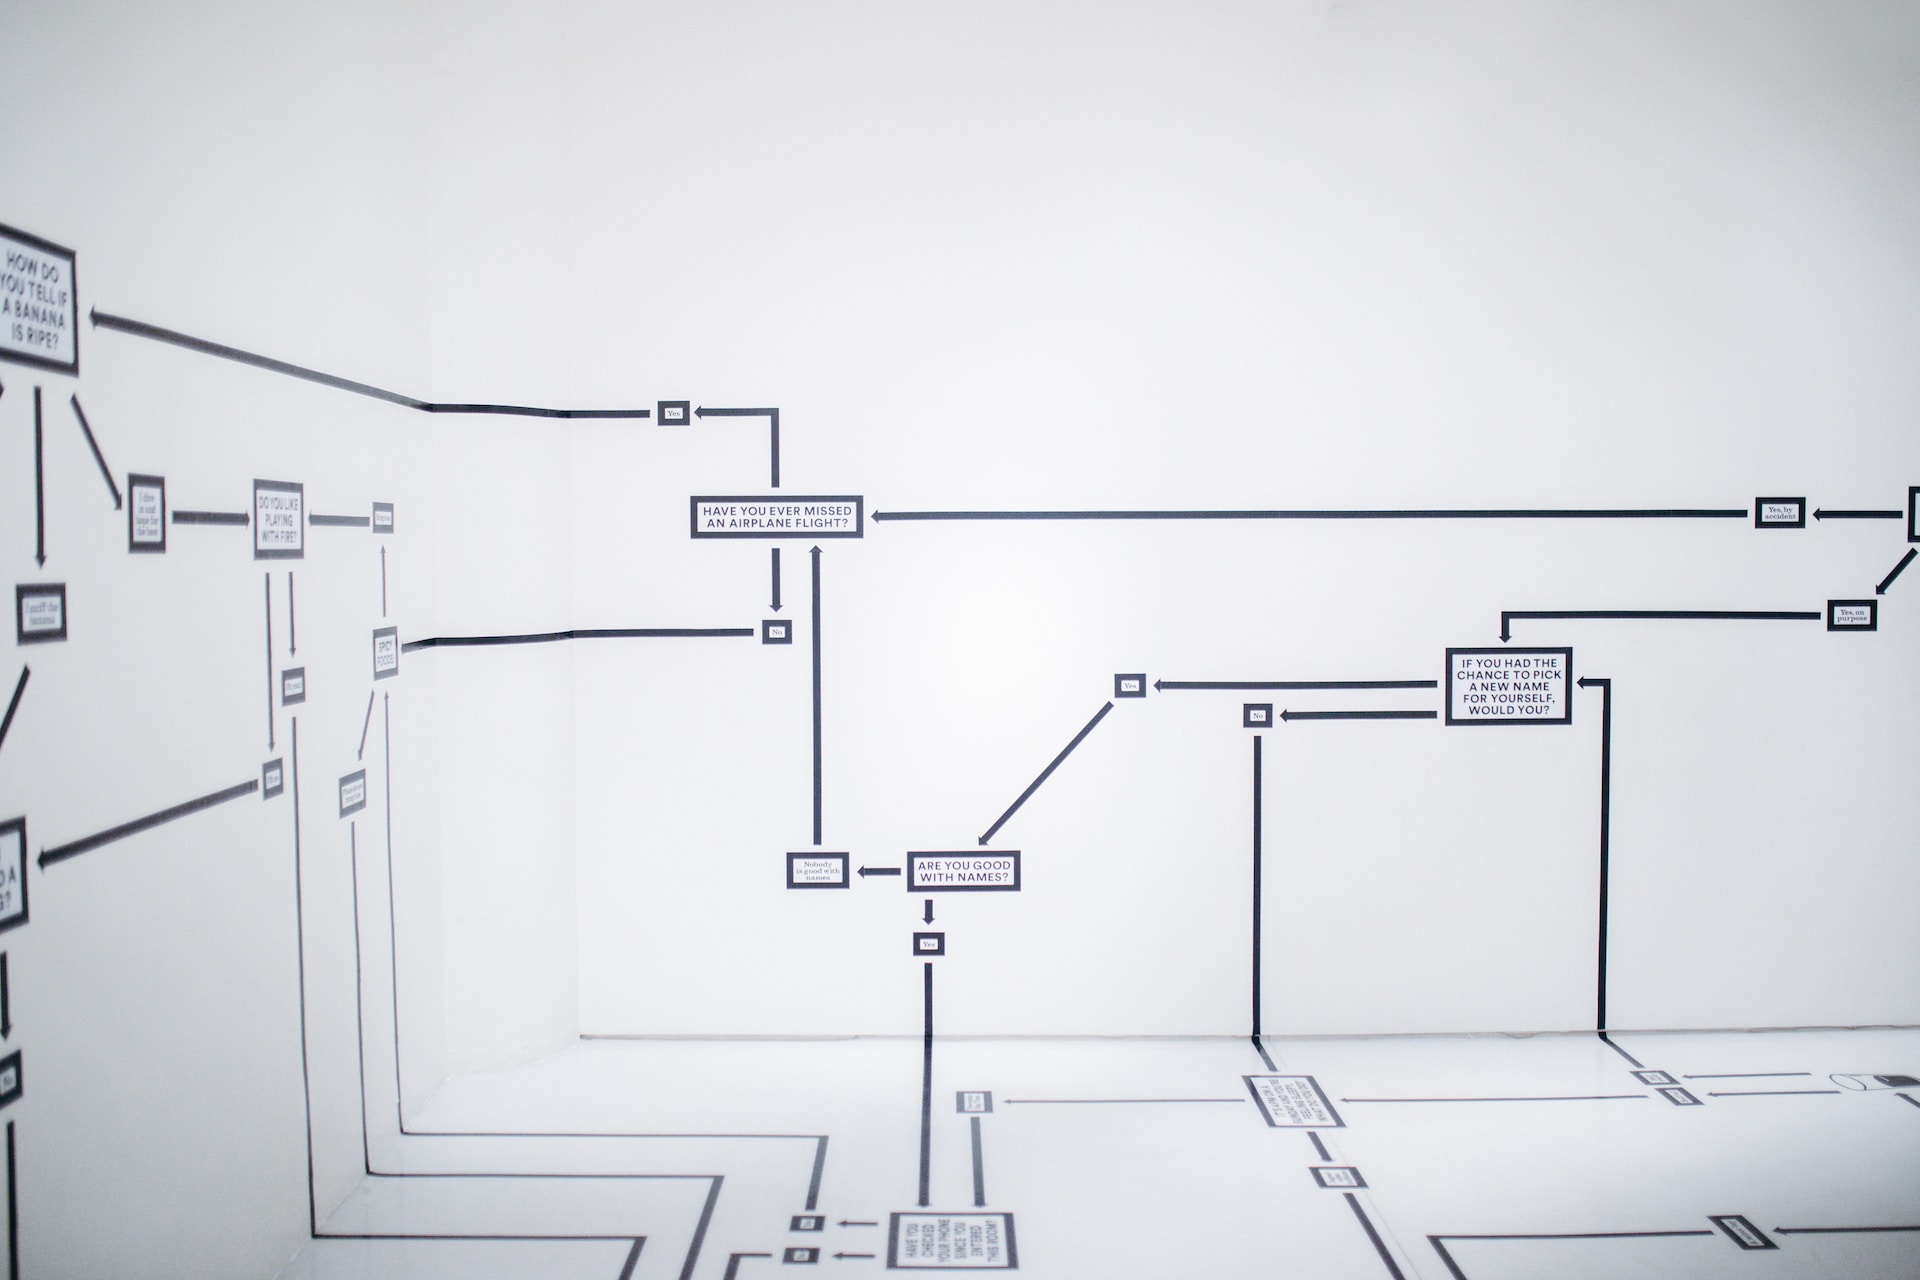
Process mapping is a visual representation of a process. It's a tool that helps you identify the steps involved in completing a task and the inputs and outputs of each step. You can use process mapping to identify inefficiencies, waste, bottlenecks, and other issues that are negatively impacting your business.
Process mapping is an essential tool for any business looking to streamline their processes and improve efficiency. By mapping out your processes, you can identify areas where improvements can be made and make changes that will have a significant impact on your bottom line.
What is a Process Map?
A process map is a visual representation of a process. It shows the sequence of steps involved in completing a task and the inputs and outputs of each step. It's a graphical representation of a process that helps people understand what they're doing, why they're doing it, and how it fits into the bigger picture.
Process maps can be as simple or as complex as you need them to be. They can be used to map out a single process or an entire business process. The level of detail you include in your process map will depend on your needs and the complexity of the process you are mapping.
Benefits of Process Mapping
Process mapping has several benefits, including:
- Identifying bottlenecks and inefficiencies.
- Reducing waste.
- Improving quality and consistency.
- Increasing productivity.
- Reducing errors and defects.
- Improving communication and collaboration.
By identifying bottlenecks and inefficiencies in your processes, you can make changes that will reduce waste and improve productivity. Improving quality and consistency will help you deliver better products and services to your customers, which will ultimately improve your bottom line.
Reducing errors and defects will save you time and money by reducing the need for rework and improving customer satisfaction. Improving communication and collaboration will help your team work together more effectively, which will improve overall efficiency and productivity.
Types of Process Maps
There are several types of process maps that you can use, depending on your needs. Some of the common types include:
- Flowchart.
- Swimlane.
- SIPOC (Suppliers, Inputs, Process, Outputs, Customers).
- Value stream map.
A flowchart is a type of process map that uses symbols to represent different steps in a process. It's a simple and effective way to visualize a process and identify areas where improvements can be made.
A swimlane process map is a type of flowchart that shows the different departments or individuals involved in a process. This type of process map is useful for identifying areas where communication and collaboration can be improved.
A SIPOC process map is a type of process map that focuses on the suppliers, inputs, process, outputs, and customers involved in a process. This type of process map is useful for identifying areas where improvements can be made to the supply chain.
A value stream map is a type of process map that focuses on the value added at each step in a process. This type of process map is useful for identifying areas where waste can be eliminated and efficiency can be improved.
Preparing for Process Mapping
Before you dive into process mapping, you need to prepare. This section will walk you through the preparation steps.
Identifying the Process to Map
The first step is to identify the process you want to map. It could be a specific business process or a departmental process. The key is to choose a process that's important to your business and has room for improvement.
For example, if you run a manufacturing company, you might choose to map your production process. Or, if you run a customer service department, you might choose to map your complaint resolution process.
When choosing a process to map, it's important to consider the impact it has on your business. A process that's critical to your operations and has a high volume of transactions is a good choice.
Gathering Necessary Information
Once you've identified the process, you need to gather all the necessary information. This includes process documentation, work instructions, and any other relevant materials. You also need to gather data on the process, including cycle time, throughput, and error rates.
Process documentation includes any written procedures or guidelines for the process. Work instructions are step-by-step instructions for completing tasks within the process. By gathering this information, you can ensure that the process map accurately reflects the current process.
Gathering data on the process is important because it allows you to identify areas for improvement. For example, if you find that the cycle time for a particular step in the process is longer than it should be, you can investigate why that is and work to reduce it.
Assembling the Process Mapping Team
You'll need a team to create the process map. The team should be cross-functional and include people who are familiar with the process. It's important to get buy-in from everyone involved to ensure the success of the project.
When assembling the team, consider including representatives from different departments or areas of the business. This can help ensure that the process map accurately reflects the entire process, not just one department's view of it.
It's also important to include someone who has experience with process mapping on the team. This person can help guide the process and ensure that the resulting map is accurate and useful.
By following these preparation steps, you'll be well on your way to creating an accurate and useful process map. The next step is to actually create the map, which we'll cover in the next section.
Step-by-Step Guide to Creating a Process Map
Process mapping is a powerful tool that helps organizations to visualize their business processes and identify areas for improvement. A process map is a visual representation of a process that shows the steps involved, the inputs and outputs, and the decision points. Creating a process map can be a complex task, but by following these steps, you can create an effective process map that will help you to optimize your processes.
Step 1: Define the Process Boundaries
The first step in creating a process map is to define the boundaries of the process. This involves identifying the start and end points of the process, as well as any sub-processes or handoffs that are involved. It's important to have a clear understanding of the scope of the process, so that you can create an accurate and comprehensive process map.
For example, if you are creating a process map for a sales process, you would need to define the boundaries of the process. This might include identifying the start point as the point at which a lead is generated, and the end point as the point at which the sale is closed. You would also need to identify any sub-processes, such as lead qualification or proposal generation, that are involved in the sales process.
Step 2: List the Process Steps
The next step is to list out all the steps involved in the process. It's important to be as detailed as possible, including any decision points or approvals that are required. This will help you to create an accurate and comprehensive process map.
For example, if you are creating a process map for a sales process, you might list out the following steps:
- Lead generation.
- Lead qualification.
- Proposal generation.
- Proposal review.
- Proposal approval.
- Contract negotiation.
- Contract approval.
- Close sale.
Step 3: Determine the Sequence of Steps
Once you've listed all the steps, you need to determine the sequence. This involves identifying which steps come before and after each other. This will help you to create a logical and efficient process map.
For example, in the sales process, lead generation would come before lead qualification, and contract negotiation would come before contract approval.
Step 4: Identify Inputs and Outputs
For each step, identify the inputs and outputs. This includes any materials, data, or information required for the step to be completed and any results or outcomes of the step. This will help you to understand the flow of information and materials through the process.
For example, in the sales process, the input for lead generation might be a list of potential customers, and the output might be a list of qualified leads. The input for proposal generation might be the customer's requirements, and the output might be a proposal document.
Step 5: Add Decision Points and Branches
If there are decision points in the process, add them to the map. Decision points are points in the process where a decision needs to be made, such as whether to approve a document or move on to the next step. This will help you to identify areas where the process can be optimized.
For example, in the sales process, the decision point for proposal approval might involve a review by the sales manager. If the proposal is not approved, it might be sent back to the proposal generation step for revision.
Step 6: Visualize the Process Map
Once you've added all the details, it's time to visualize the process map. You can use a flowchart or swimlane diagram to create a visual representation of the process. This will help you to communicate the process to others and identify areas for improvement.
For example, you might create a flowchart that shows the sales process from lead generation to sale closure, with decision points and branches clearly marked.
Step 7: Validate and Refine the Process Map
The final step is to validate and refine the process map. This involves reviewing the map with the process team and making any necessary changes. Once everyone agrees on the process map, it's time to implement the changes. This will help you to optimize your processes and improve your business performance.
Conclusion
Process mapping is a valuable tool for improving business processes. By following the steps outlined in this guide, you can create a process map that provides valuable insights into your processes and identifies areas for improvement. Remember to involve the process team, gather all the necessary information, and be as detailed as possible. With a well-designed process map, you can improve productivity, reduce waste, and increase quality and consistency.
